

Wie erstellt man Passdateien? Schritt-für-Schritt-Anleitung
Are you planning an exhibition made up of several elements of a system but with one shared graphic? Find out how to correctly prepare matched files to avoid misalignments and corrections before printing.
Wann und warum Passdateien verwenden?
Matched files should always be prepared when you want to combine several rectangular elements into one graphic. This usually applies to textile frames or LED lightboxes placed next to each other. Thanks to matching, you can be sure that the whole setup will look like one image rather than several separate panels.
To prepare matched files, the project must be divided into several files. Each file should contain a fragment of the graphic from the previous one. This repeating fragment is the so-called overlap area, which ensures image continuity.
Why is this so important? Small gaps and shifts always appear between systems due to factors such as keder sewing, cutting, profile thickness, or the assembly itself. In addition, the material may shrink slightly, and part of the graphic is used for technical areas. When files are prepared “edge to edge,” lines and patterns can easily become misaligned, while side edges wrapped inside the frame and finished with a keder break the image flow. With an overlap area, the graphic forms a coherent whole – flowing smoothly from one frame to another and looking exactly as intended.
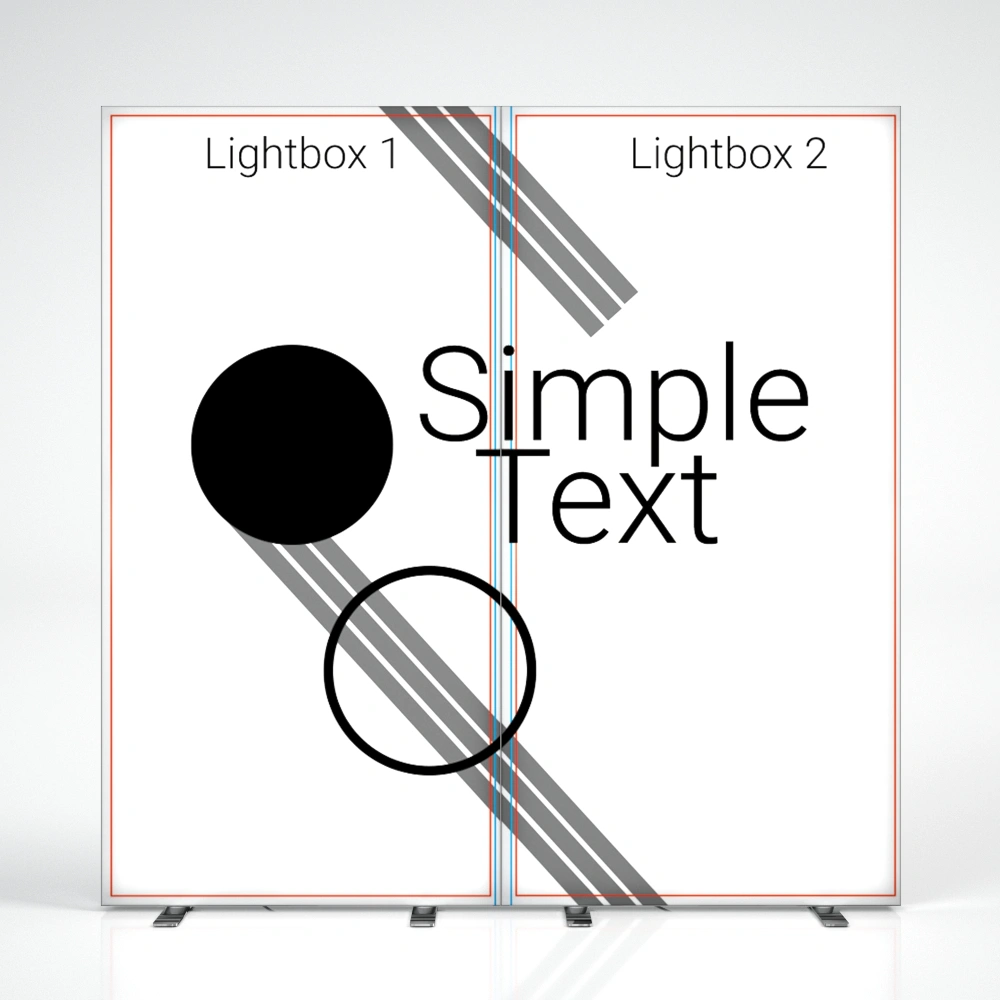
Good
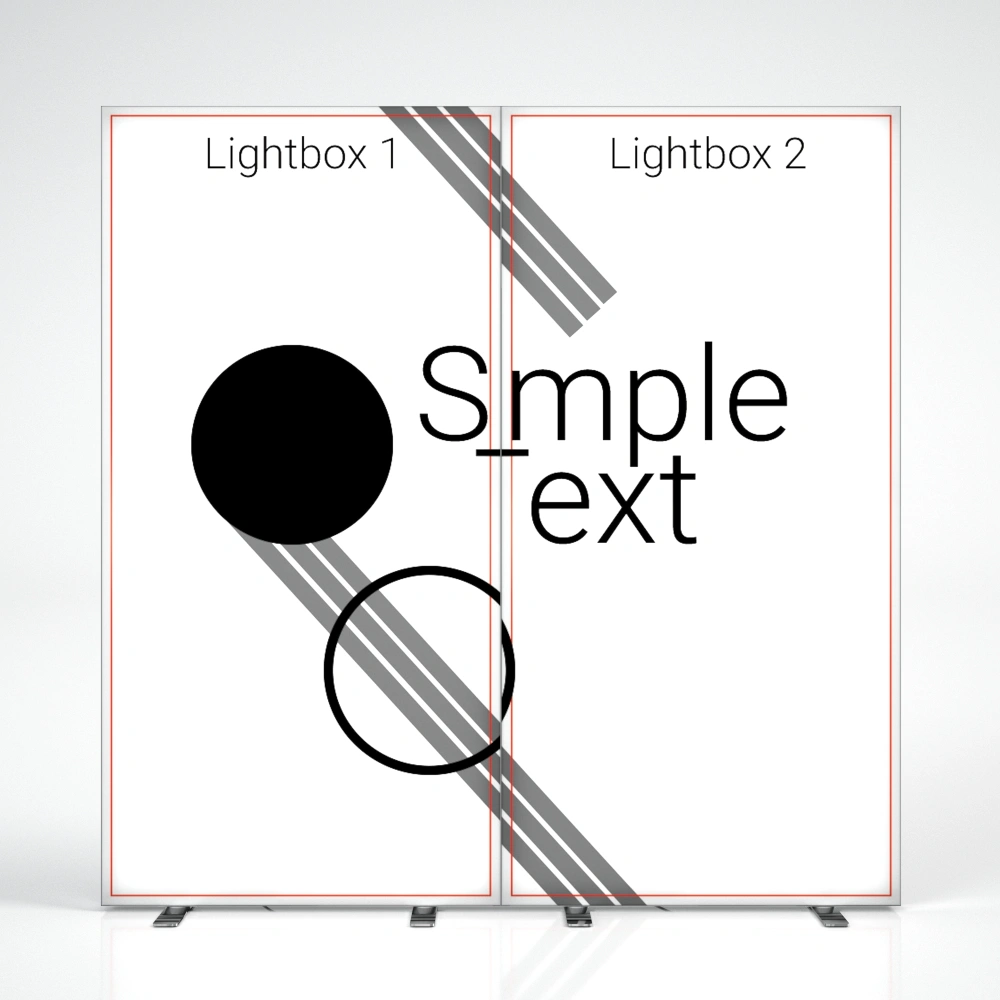
Bad
Wie erstellt man Passdateien?
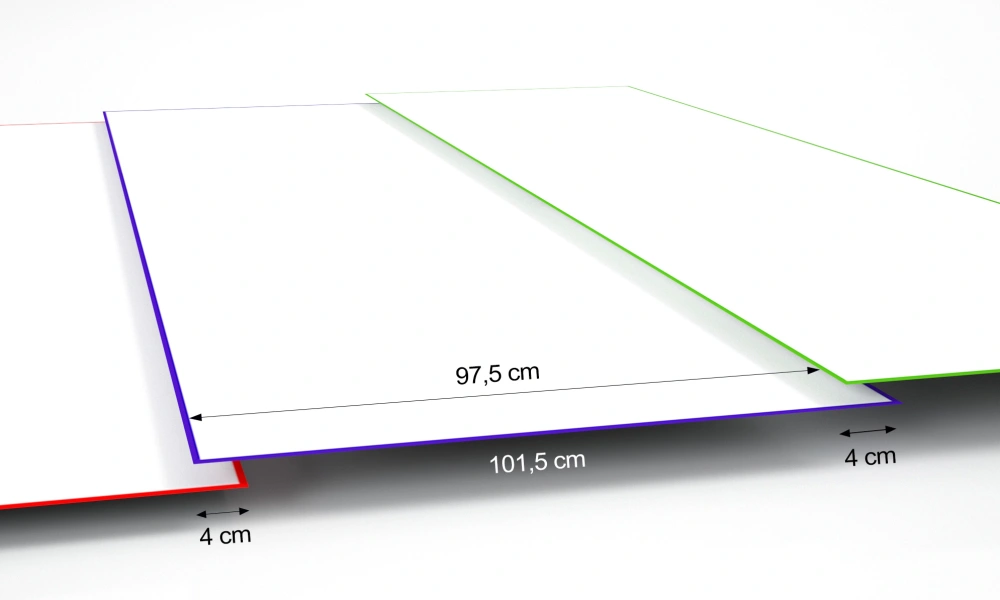
The rule for preparing matched files is simple: each subsequent file should include 4 cm* of the previous image to maintain graphic continuity. Below you’ll find a diagram based on printing guidelines for 100×250 cm:
How to prepare matched files in practice? Follow this short instruction prepared by our graphic team:
*Note!
For SEGO systems the overlap area is 3 cm. This is an exception to the rule.
Zusammenfassung
Preparing matched files may sound complicated, but in practice it comes down to a few simple rules. Always work with the guidelines downloaded from the website, stick to the given dimensions, and leave an overlap area – 4 cm (or 3 cm in the case of SEGO systems) between subsequent files. This way, the graphic will flow smoothly across all systems, without gaps or misalignments.
If you follow this scheme, your exhibition will fully match the project, and you’ll avoid unnecessary corrections and stress right before printing.


- Druck
 Revolution in der Leuchtkastenproduktion – schneller und präziser
Magst du die hektische Atmosphäre vor einer Messe nicht? Wir auch nicht. Deshalb haben wir beschlossen, der Zeit einen Schritt voraus zu sein, statt ihr hinterherzulaufen. In unseren Maschinenpark haben wir ein neues Gerät integriert – den Schneideplotter ZUND. ZUND automatisiert den Schneideprozess, erhöht die Präzision und minimiert das Fehlerrisiko. Erfahre, wie diese neue Maschine die Umsetzung deiner nächsten Bestellung beschleunigen kann.
Mehr lesen
- DruckWie erstellt man Passdateien? Schritt-für-Schritt-Anleitung
Planen Sie eine Ausstellung, die aus mehreren Elementen eines Systems besteht, aber mit einer einzigen gemeinsamen Grafik? Erfahren Sie, wie Sie Passdateien korrekt vorbereiten, um Verschiebungen und Korrekturen vor dem Druck zu vermeiden.
Mehr lesen - MarketingDruck
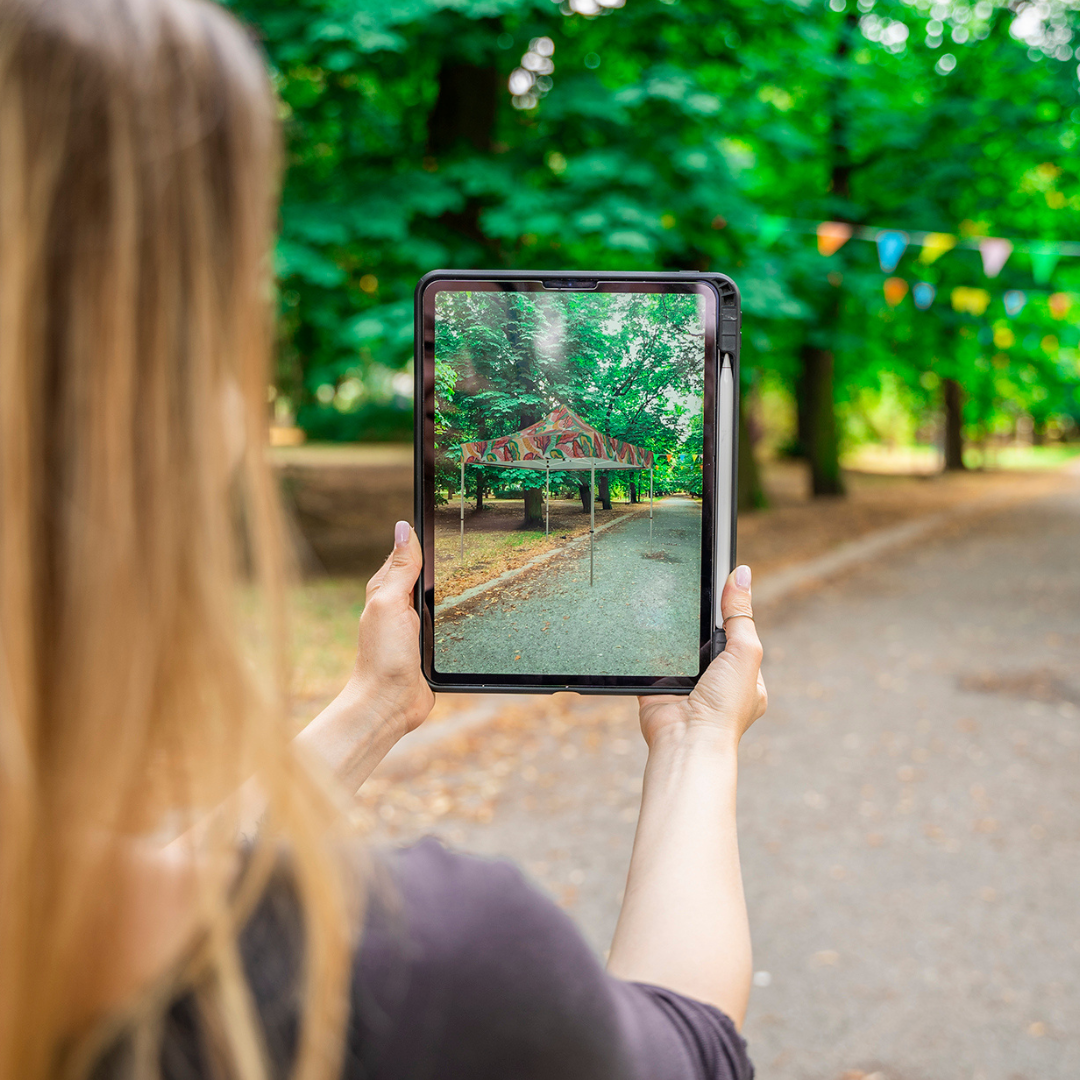 AR-Technologie: von der Visualisierung bis zur Umsetzung
AR-Technologie ist eine moderne Unterstützung im Kaufprozess. Sie hilft dabei, Fehlkäufe zu vermeiden und nicht sprichwörtlich die Katze im Sack zu kaufen. Erfahre, was genau hinter dieser Technologie steckt und wie sie dich beim Online-Shopping unterstützen kann.
Mehr lesen - Druck
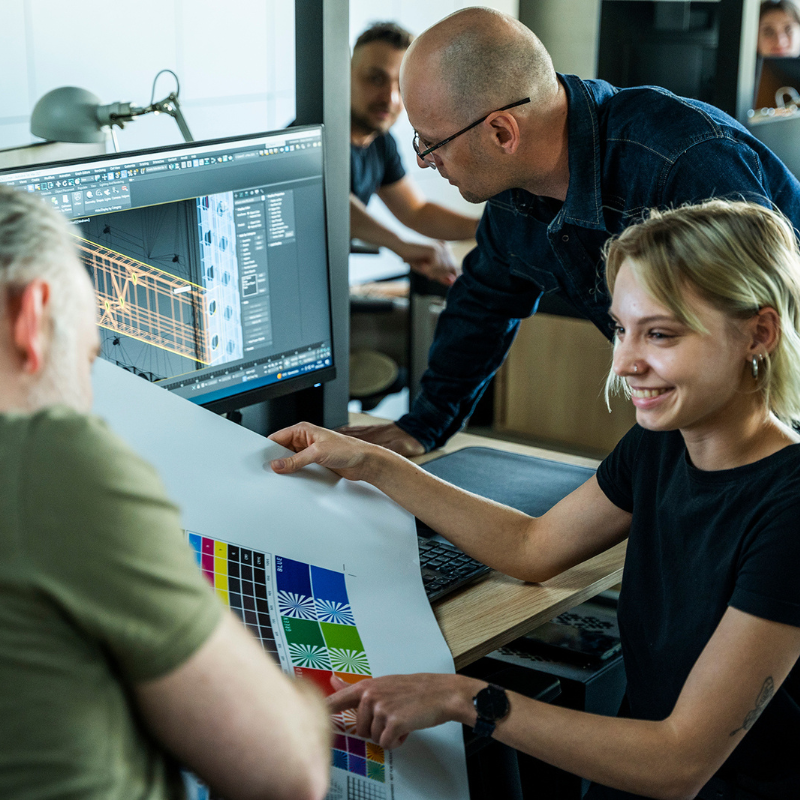
 Dateiprüfung: der Schlüssel für eine reibungslose Auftragsabwicklung
Du bist dir nicht sicher, ob deine Dateien den Richtlinien entsprechen? Bei adsystem nutzen wir ein fortschrittliches File-Checker-System und das Know-how unserer Grafiker:innen, um technische Fehler bereits zu Beginn des Prozesses zu vermeiden. Erfahre, was unsere Prüfung umfasst und worauf du als Kunde achten solltest.
Mehr lesen - Druck
 Sublimationsdruck – so gelingen hochwertige Grafiken auf Textilien
Kräftige Farben, klare Details und hohe Widerstandsfähigkeit – das sind die Merkmale, die Werbematerialien besonders attraktiv machen. Wie lässt sich dieser Effekt auf Textilien erzielen? Die Sublimation ist eine bewährte Technik, die höchste Druckqualität garantiert.
Mehr lesen